
The Underwater Photography Process, Part 1: Pre-Production
What It Really Takes Before You Ever Get in the Water
I’ve been doing a lot of zooming out lately. Looking at where I am, where I want to be, and then zooming back in to figure out what steps actually get me there.
That’s part of why I started this blog. Yes, I wanted a little more creative freedom. Yes, I wanted to give my business a gentle nudge forward (I still don’t know how to spell “jooshing”, so let’s just pretend I do). But mostly, I wanted a space to share what I’ve learned, because so much of what I know about photography came from other photographers who were generous enough to teach, explain, and nerd out with me along the way.
So this post is for you if you’re the kind of photographer who loves learning from other photographers. The kind who picks up tips from mentors, friends, YouTube deep dives, Instagram rabbit holes, and strangers on the internet who don’t even know they’ve helped you.
Let’s get nerdy together.
The Three Parts of Every Shoot
Before we go underwater, let’s zoom out for a second. Every shoot, whether it’s on land or in the ocean, has three essential phases:
Pre-production
This is where you plan what you want to create. Mood boards, models, locations, outfits, timing, light, logistics. It’s the thinking part.
The shoot
This is where the magic (and chaos) happens. You’re in the water, holding your breath, chasing light, fish, or floating humans, and hoping the plan survives contact with reality.
Post-production
The love-hate phase. Organizing, culling, editing, color correcting, and bringing the images back to life.
Each of these deserves its own space, because each one can make or break a shoot.
This post is all about pre-production, the part that quietly determines whether you come home with “okay” photos… or the photos.
Step One: What Kind of Shoot Is This?
The very first question you need to answer is simple, but everything hinges on it:
Is your subject a person, or wildlife?
Because those are two completely different worlds.
If You’re Shooting People
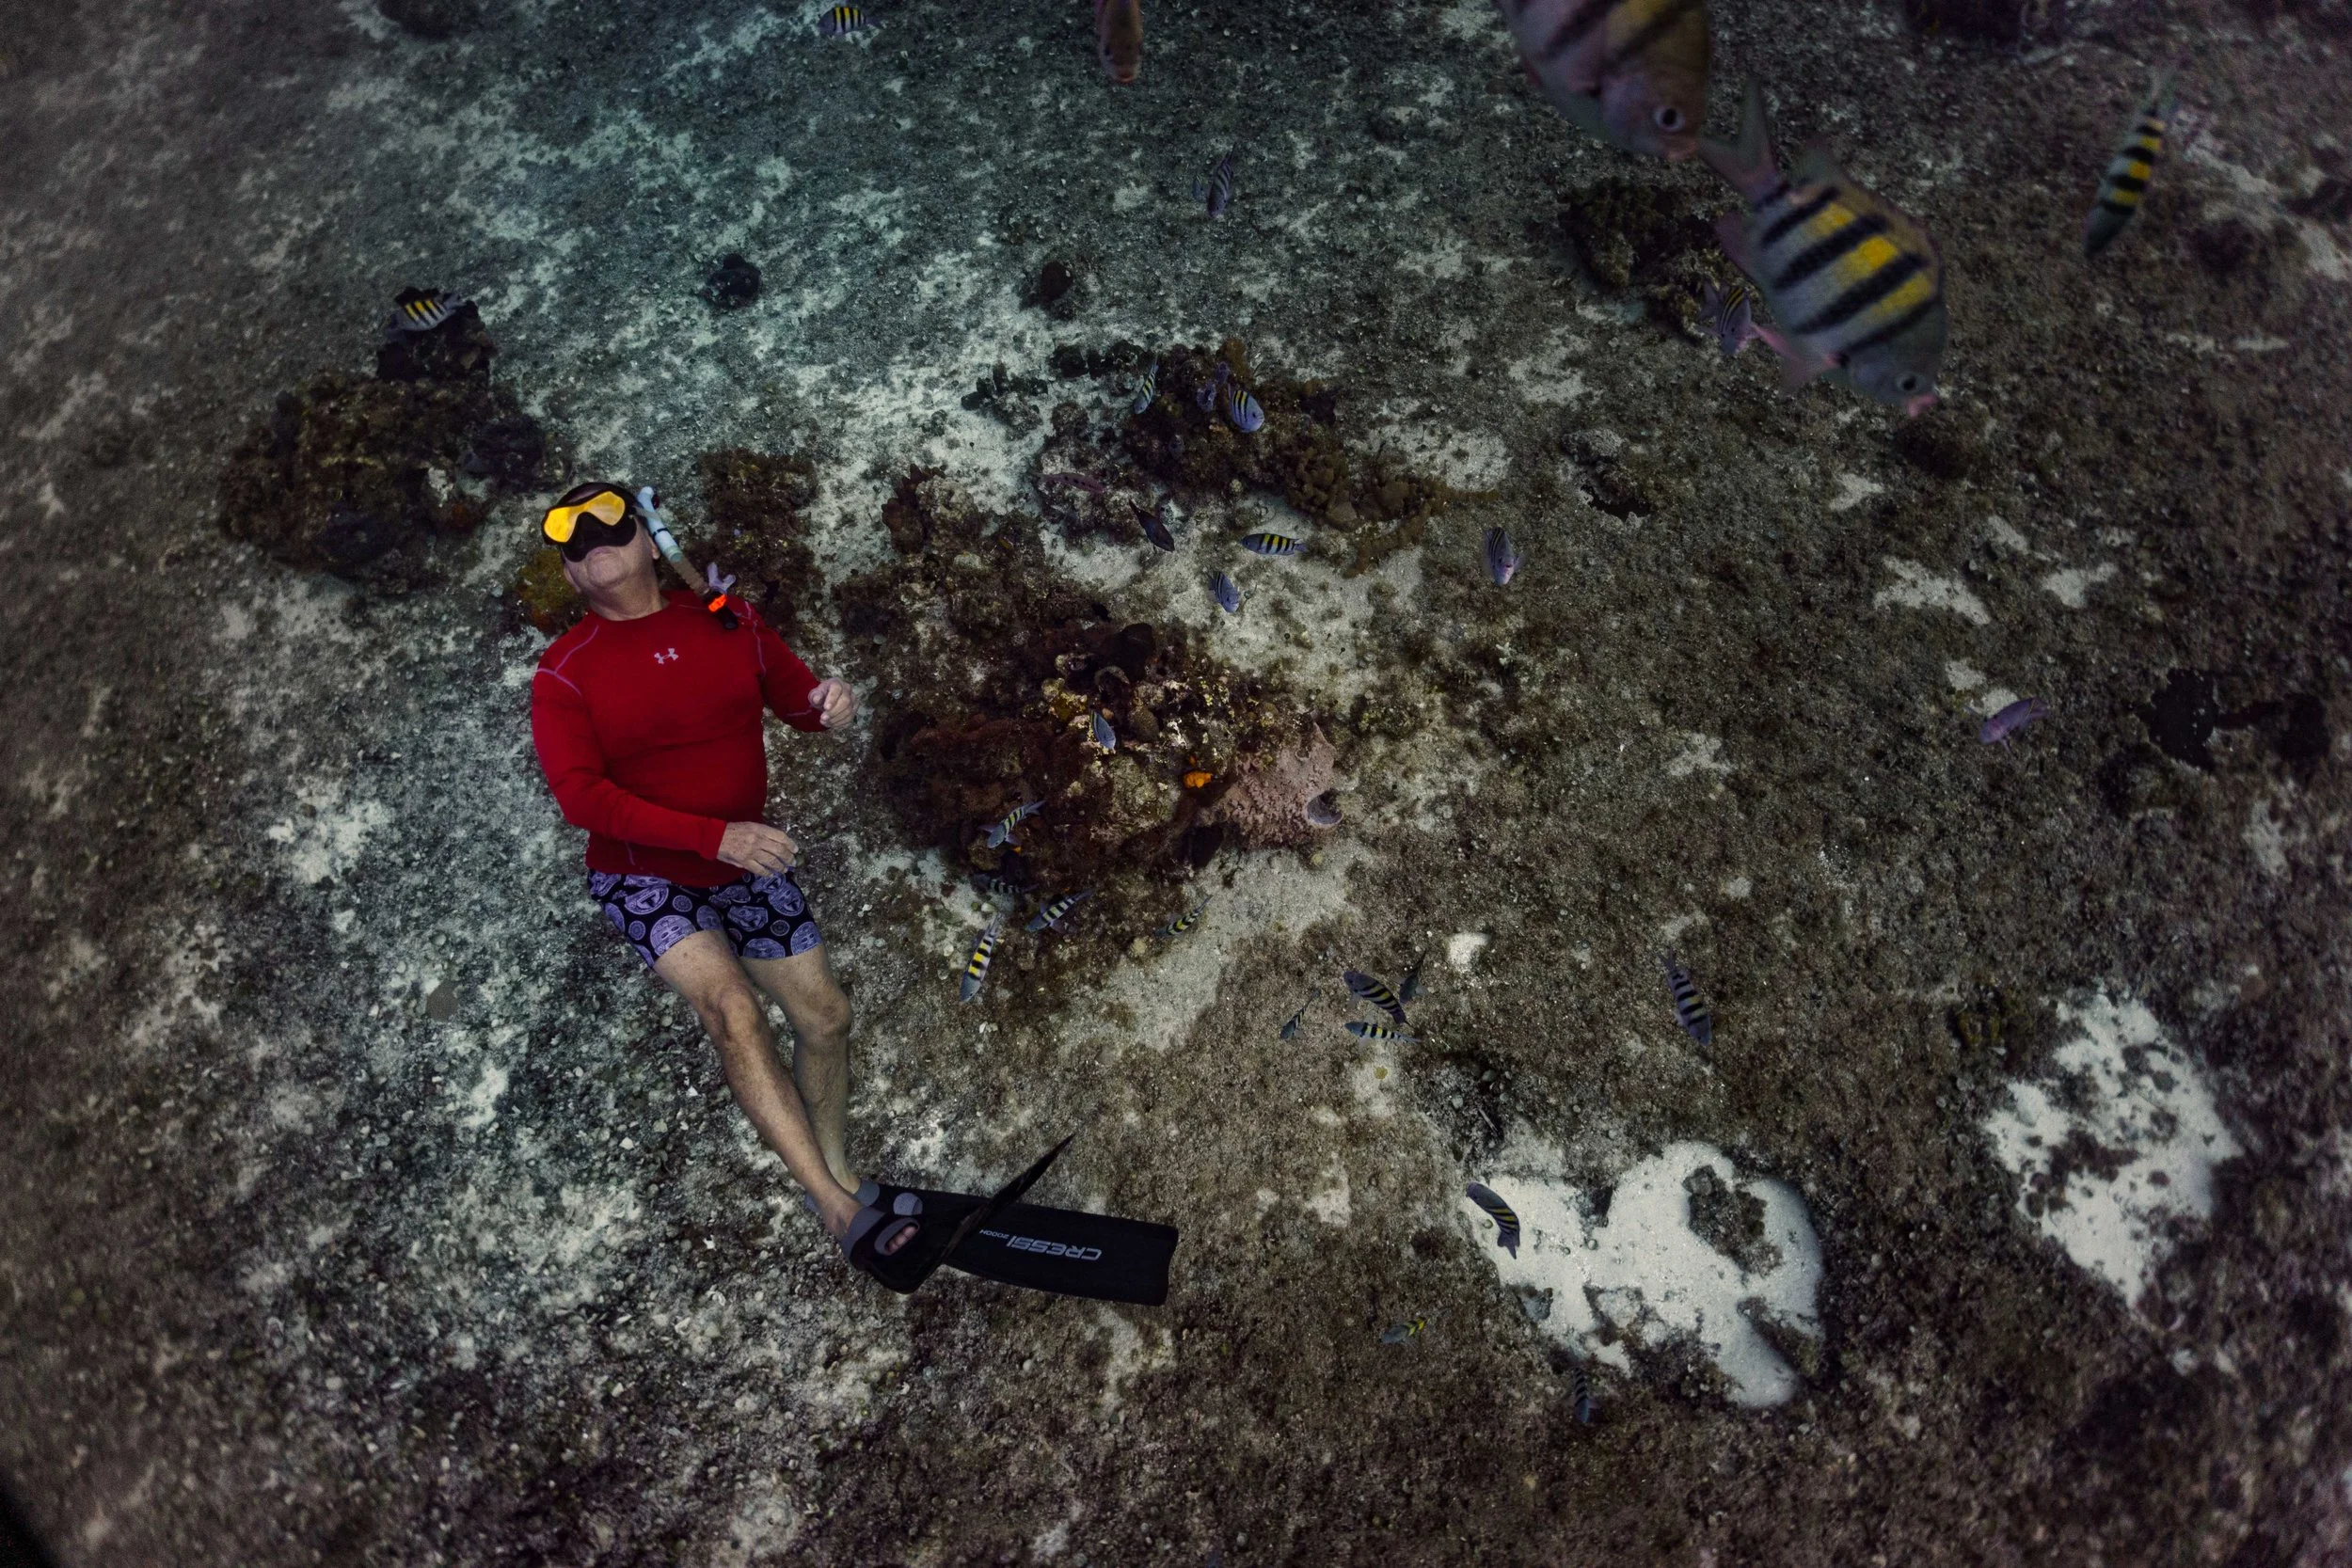
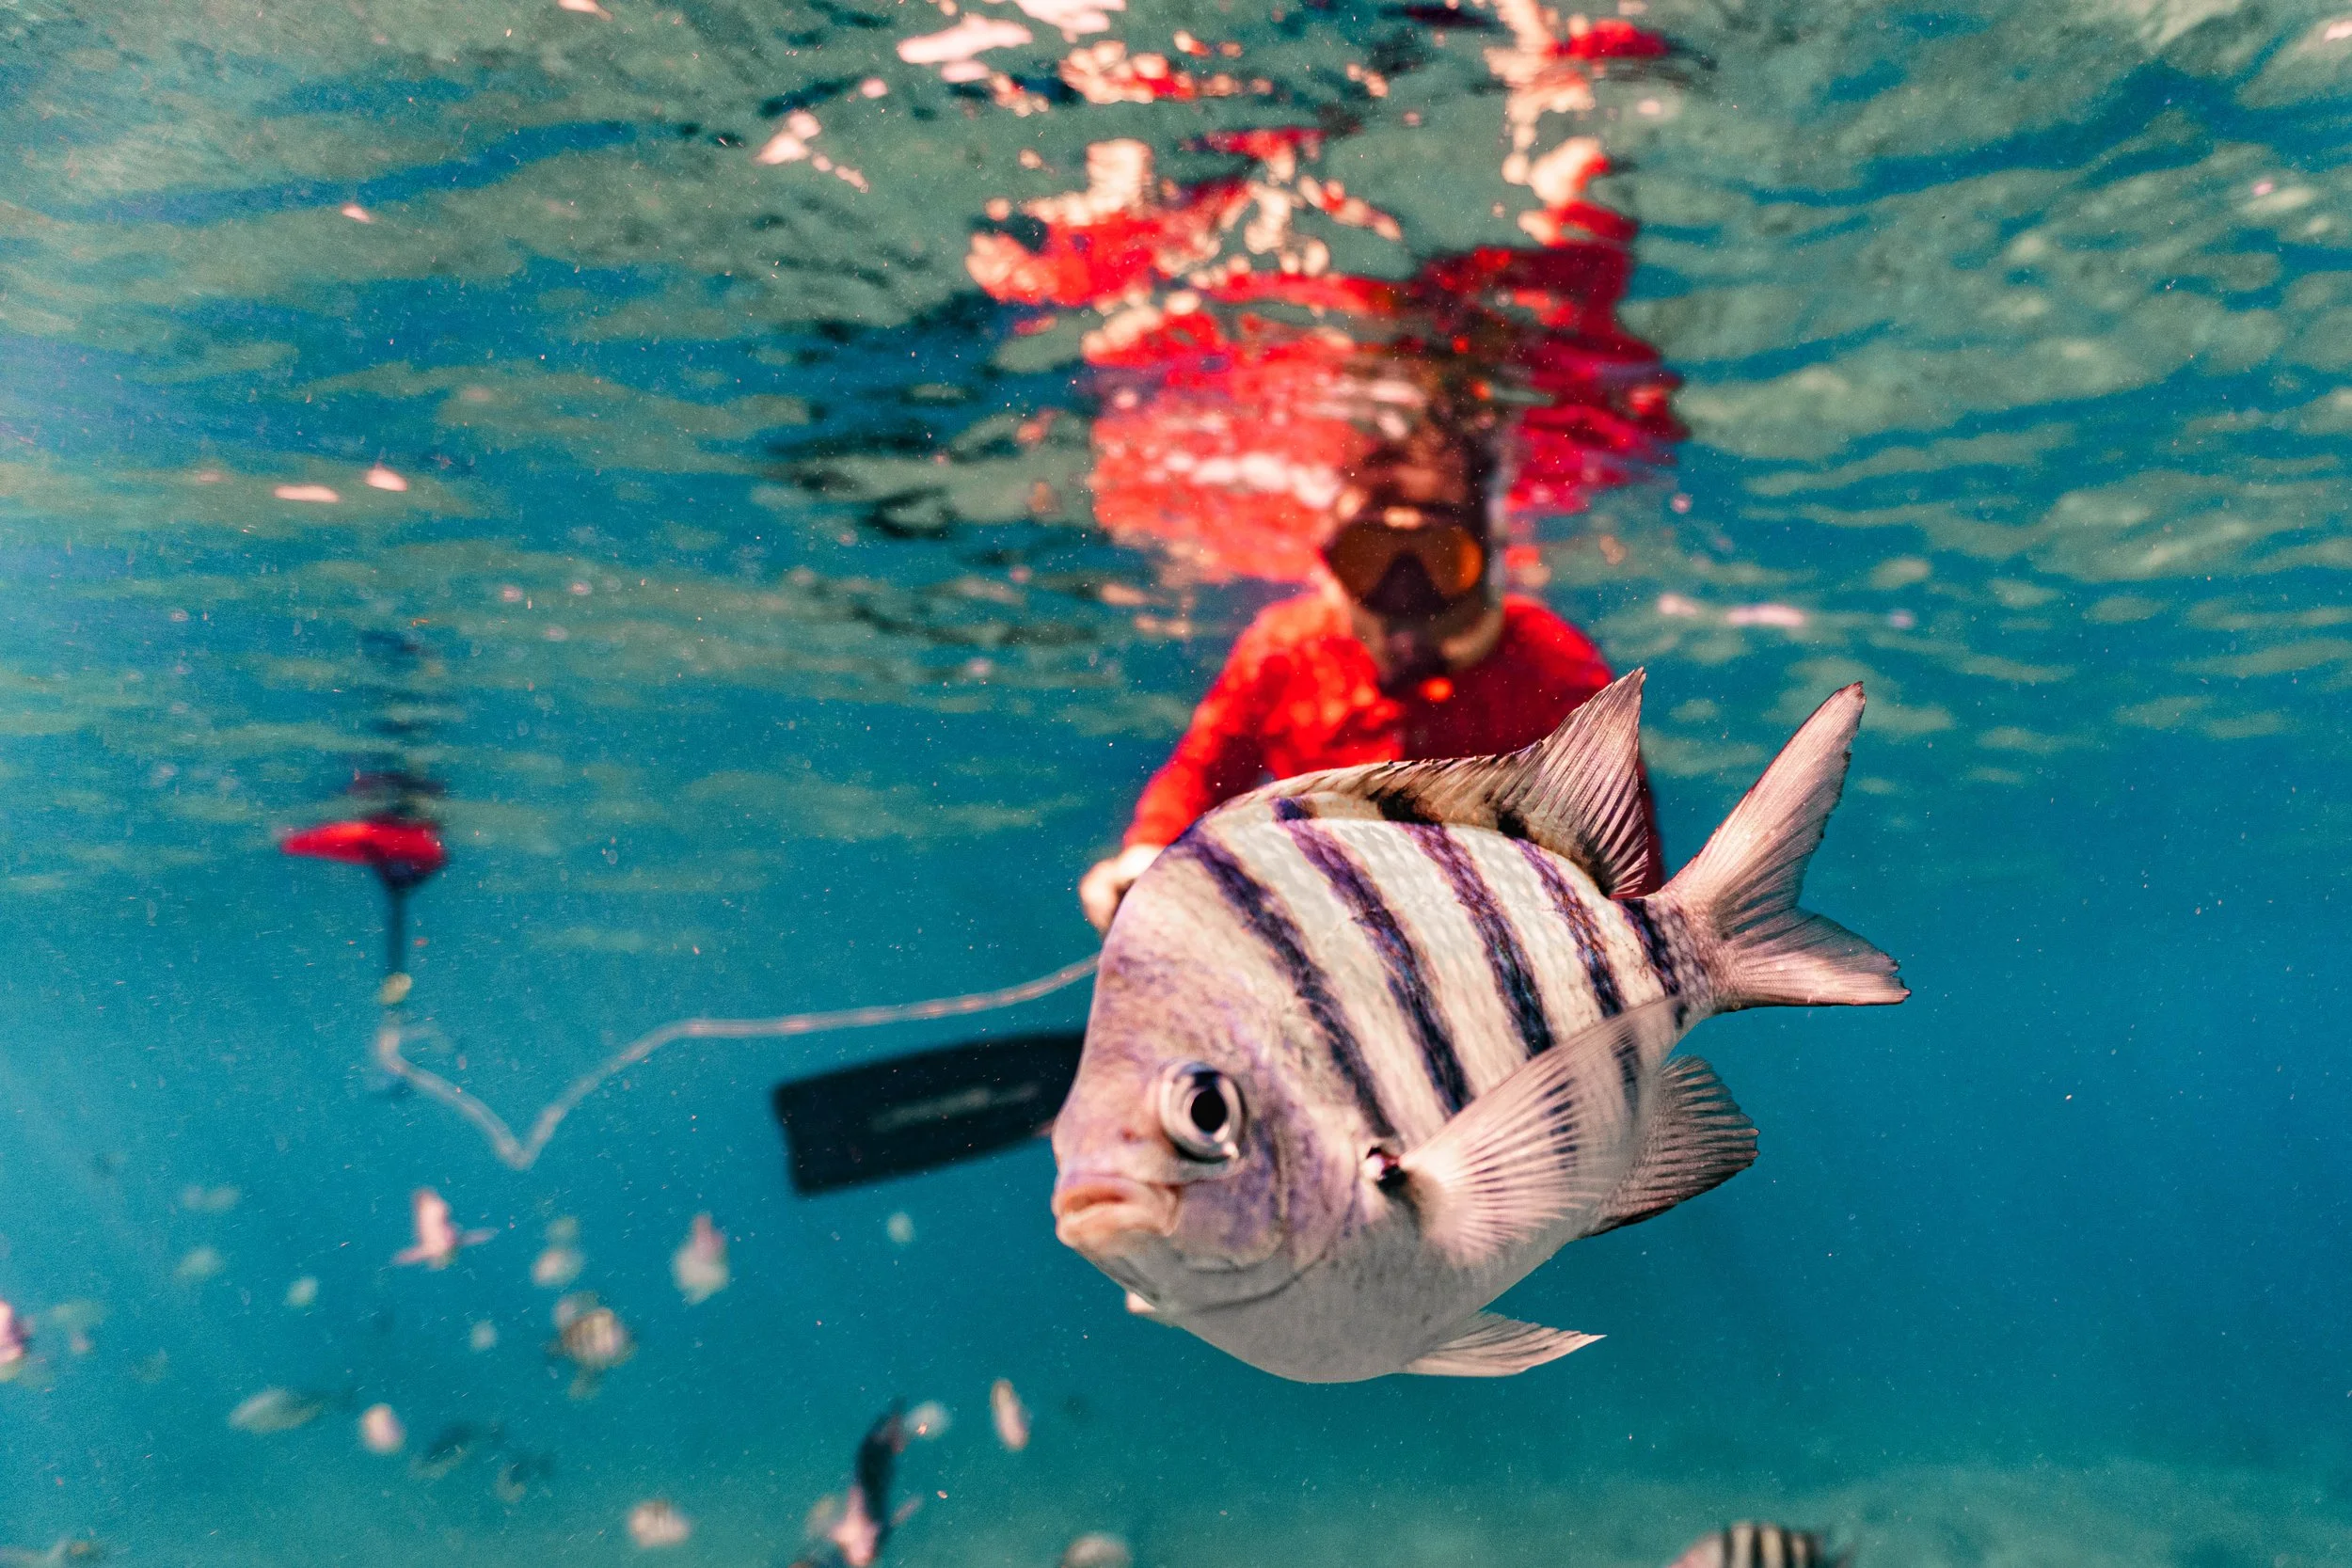
If your subject is human (or several humans), experience in the water matters… a lot. If you’re shooting at depth, working with people who are comfortable freediving will make your life infinitely easier.
Posing underwater is hard. It looks effortless on Instagram, but in reality it’s breath holds, coordination, buoyancy control, and trying to look relaxed while your lungs are screaming.
Here’s what I always plan ahead:
Wardrobe & accessories
Light colours refract more light, darker colours absorb it. This alone can change the entire feel of a shot.
Breaks
Repeating the same pose over and over is exhausting. Plan time to rest, breathe, and reset.
Safety, always
Buddy system. Recovery breaths. Clear communication. No shot is worth risking someone’s well-being.
The smoother and safer the experience is for your models, the better your photos will be. Every time.
If You’re Shooting Wildlife
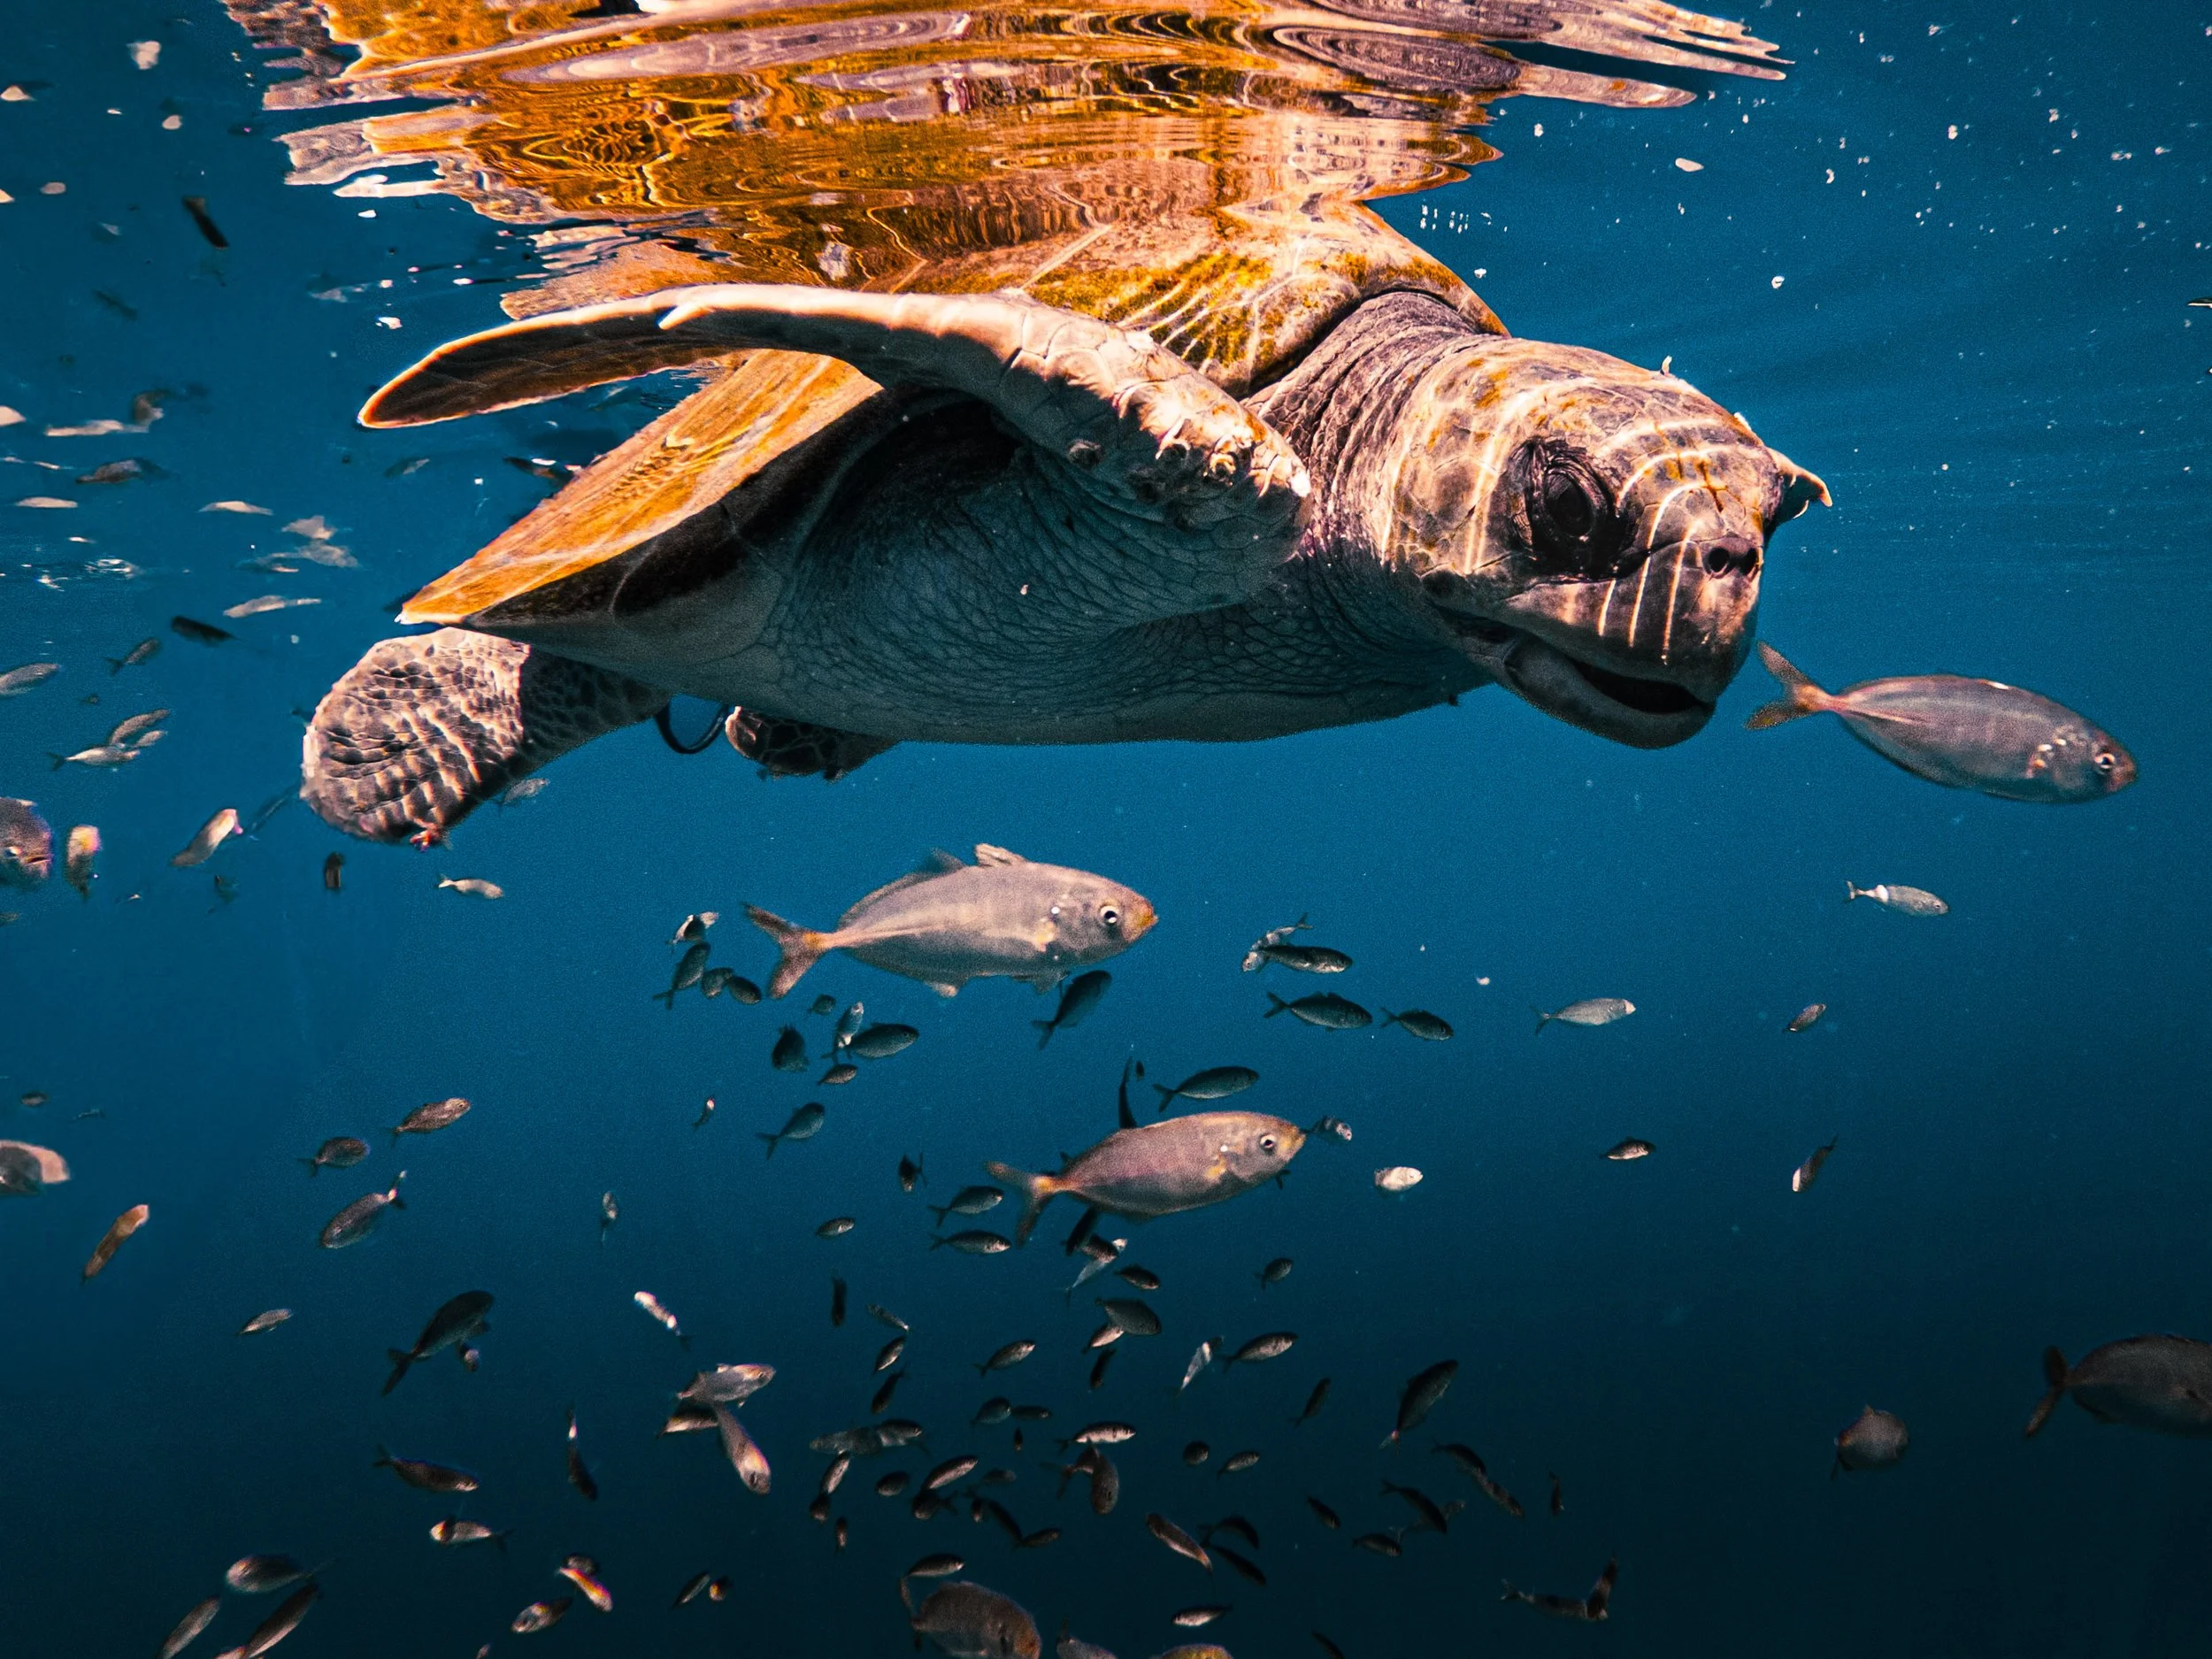
The number one rule:
Observe first. Shoot second.
You are a guest in someone else’s home.
Learning about the species you’re photographing is non-negotiable. Going out with guides who understand animal behaviour, and respect it, is even more important. I’ve worked in sea safaris and I’ve seen both sides: beautiful, respectful interactions… and absolutely awful ones where people will do anything for a selfie.
Yes, wildlife cares about consent too. 😉
Before you ever get in the water, someone, either you or your guide, should be reading the animal’s behaviour. Stress signals. Curiosity. Disinterest. All of it matters.
A very important note:
Know the laws.
Different species have different levels of protection depending on where you are in the world. Not knowing isn’t an excuse (a simple Google search will give you an answer), and the ocean doesn’t need more “that person” energy.
Also, from a purely selfish standpoint:
You will get better shots if the animal is comfortable and curious. Patience almost always wins.
From a sustainable standpoint:
Calm, respectful behavior protects the animal, the ecosystem, and the experience for everyone else.
And sometimes? You just don’t get the shot.
That’s nature. Build extra days into your plan when possible. The ocean does not run on your schedule.
Your Gear (Not the Camera Kind)
By “gear,” I mean you:
Wetsuit or swimsuit
Mask
Weights
Fins
My biggest tip here:
Get freediving fins.
They’re longer, smoother, and more efficient, which means your movement is smoother. And when you move smoothly, your photos and videos look smoother too.
Seriously. Game changer.
Camera Settings: Set Up Before You Seal the Housing
Always set up your camera before it goes into the housing. Changing settings underwater is awkward at best and impossible at worst. Some housings won’t even let you zoom or easily change aperture.
Here’s what I prioritize:
Shutter Speed (This Is Everything)
The ocean is in constant motion.
The model. The fish. The sand. The current. You.
If you want crisp shots:
People: 1/640 or higher
Wildlife: 1/2000 or higher (they’re fast, and they don’t care about your shot)
Continuous Shooting
Set your camera to high-speed continuous shooting.
Shooting 6–14 frames per shutter click can be the difference between “almost” and “nailed it.”
Half a second matters underwater. Trust me.
Manual vs. Priority Modes
On land, I’m a manual-everything person.
Underwater? Different game.
I usually:
Keep autofocus on (fast AF is your friend)
Shoot manual with a high shutter speed
Set my aperture somewhere in the middle, like f/8–f/11
Shallow depth of field is trendy, but underwater, everything moves. If you’re at f/2.8 and a fish swims between you and your model (human or not), something important is about to be blurry (because autofocus).
Unless that’s the look you want, then go wild. Like in this photo, I went wild because I didn’t want the fish to get lost in the model that’s in the background.
However, generally speaking, that is why I don’t like to use shutter priority mode when I’m underwater.
White Balance
Set it to underwater.
Future you will thank you in post.
Work smarter not harder.
Shoot RAW. Always.
Underwater photos must be edited.
The deeper you go, the more color you lose, starting with red. Shooting JPEG throws away information you can’t get back.
RAW gives you options. Options are everything.
The Final Pre-Production Checklist
Before your shoot:
Batteries charged (Sony, I’m looking at you)
Memory cards empty
Housing loaded in a clean, non-ventilated space with good light
One grain of sand can mean a very expensive goodbye. Trust me, I speak from experience.
Weights sorted for depth, suit, and buoyancy
Buoy if needed (for visibility and extra weight storage)
Mood Boards, Plans, and Letting Go
I love Pinterest. It helps me communicate ideas and build a visual language for a shoot.
But once you’re underwater?
Your mood board is in your head.
Things change. Weather shifts. Currents move. Animals show up, or don’t. Sometimes you scrap the plan entirely and work with what the ocean gives you.
Prepare deeply.
Then be ready to let it go.
That’s it for Pre-Production!
Next post, we’ll get into The Shoot, the breath holds, the chaos, the moments of pure magic, and everything that happens when the plan meets real water.
Is there anything else you think should make it onto the pre-production list?
I’d also love to know, are you more of a “plan every detail” shooter, or a “go with the flow and see what the ocean gives me” kind of creative?
My inbox is always open :)
Wishing you salty sunshine,
Shirena